
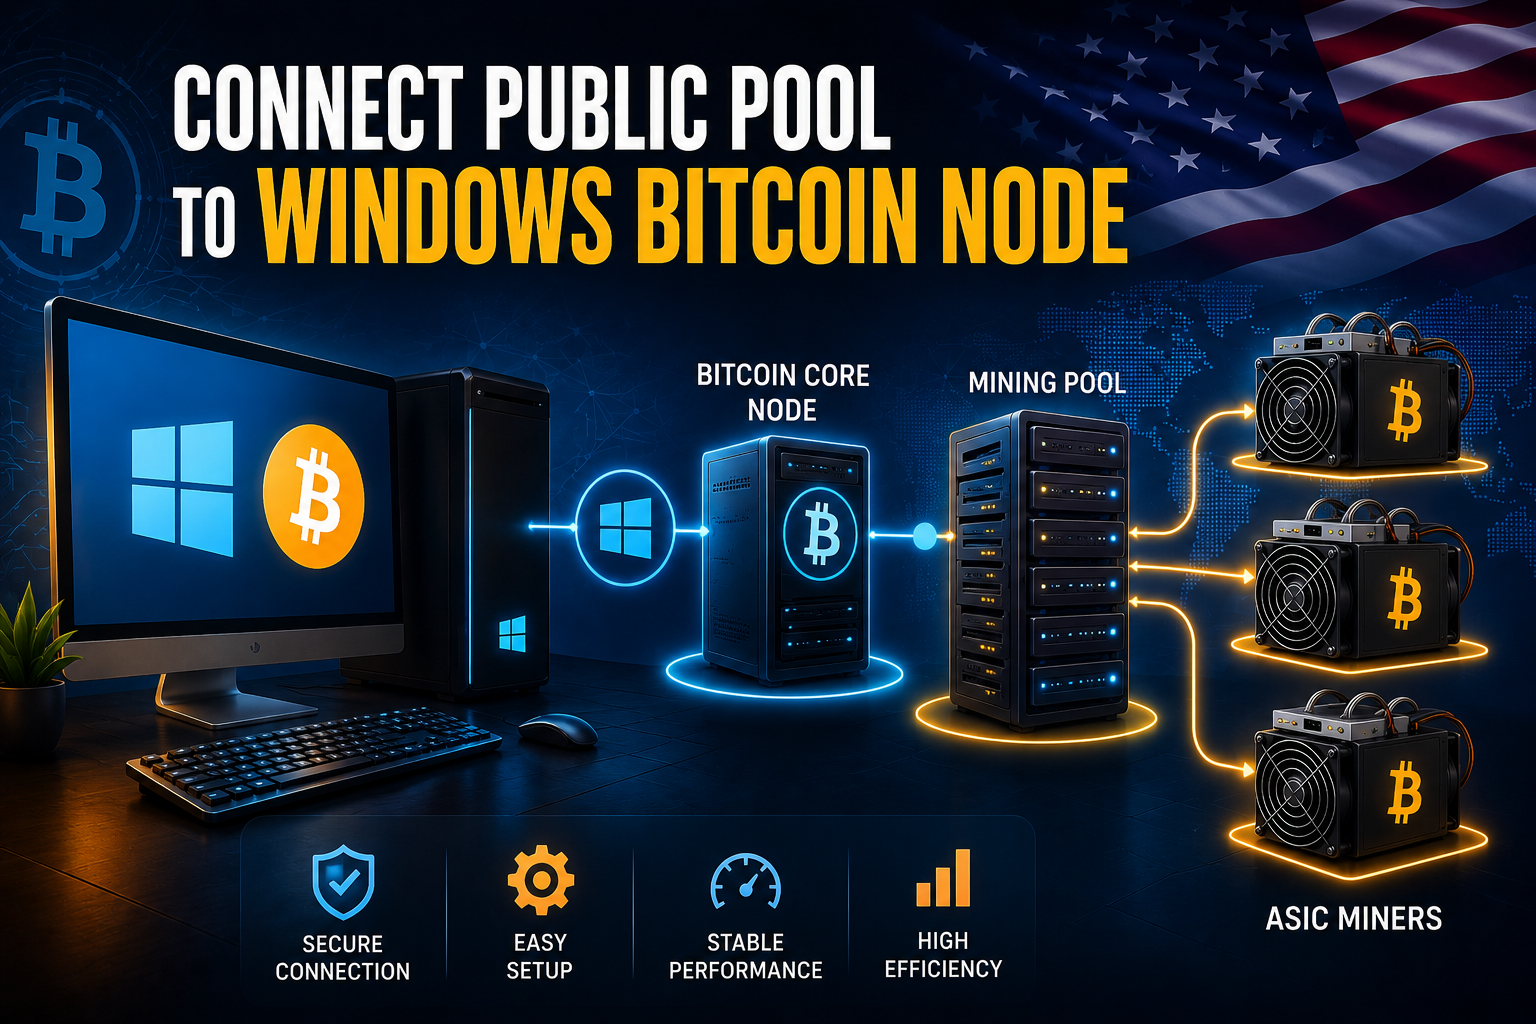
How to Connect Public Pool to Windows Bitcoin Node
Running a Bitcoin node on Windows is one of the best ways to understand how the Bitcoin network works. A full node independently verifies blocks and transactions, while mining pools coordinate miners and distribute work. Because these two systems have different jobs, connecting a public mining pool to a Windows Bitcoin node is not always as straightforward as entering a node address into a mining application.
In fact, one of the most important things to understand is that a typical public Bitcoin mining pool does not directly connect to your personal Bitcoin Core node. Instead, your mining hardware or mining software normally connects to the pool using a mining protocol such as Stratum. The pool itself may operate one or more Bitcoin Core nodes to obtain blockchain information and construct or validate mining work.
However, if your goal is to run a mining pool yourself, connect pool software to your Windows Bitcoin Core node, or use your node as part of a private mining setup, Bitcoin Core’s RPC and mining interfaces become important.
This guide explains the architecture, Windows configuration, RPC setup, troubleshooting steps, and security considerations in plain English.
What Does Connecting a Public Pool to a Bitcoin Node Actually Mean?
Before changing any settings, it helps to understand the three main components involved:
- Bitcoin Core node
- Mining pool or pool software
- ASIC miner or mining software
A Bitcoin Core node maintains a copy of the Bitcoin blockchain and independently verifies the rules of the network. Bitcoin Core also provides RPC interfaces that applications can use to communicate with the node. Current Bitcoin Core documentation includes RPC methods such as getblocktemplate, getblockchaininfo, getmempoolinfo, and submitblock.
A mining pool, meanwhile, coordinates many miners. Rather than every miner independently attempting to discover a Bitcoin block, miners receive work from the pool and submit shares back to it.
The basic architecture looks like this:
Bitcoin Core Node → Pool Software → Stratum Server → ASIC Miners
For someone using an existing public pool, the usual setup is slightly different:
Bitcoin Core Node → Your own blockchain/network services
and separately:
ASIC Miner → Public Mining Pool
That distinction is critical.
If you simply want to mine Bitcoin through a public pool, you generally do not need to expose your Bitcoin Core RPC interface to that pool.
Why Run a Bitcoin Node on Windows?
Bitcoin Core supports Windows, and the official Bitcoin download page provides Windows installers and ZIP packages. The current Bitcoin Core release listed by Bitcoin.org is version 31.1.
A personal node can provide several advantages:
- Independent blockchain verification
- Better understanding of Bitcoin’s network
- Local access to blockchain information
- Local RPC access for compatible applications
- Greater control over your infrastructure
- An opportunity to contribute to Bitcoin’s decentralized network
Bitcoin Core is designed to independently determine which blockchain follows Bitcoin’s consensus rules.
However, running a full node requires storage, bandwidth, and synchronization time. Bitcoin.org currently lists roughly 750 GB of disk space for the default configuration and notes that the initial blockchain download is very large. Pruning can substantially reduce storage requirements, but a pruned node has limitations for certain applications.
Step 1: Install Bitcoin Core on Windows
The first step is to install Bitcoin Core on your Windows computer.
Download Bitcoin Core from the official Bitcoin website rather than an unknown third-party download site.
After installation:
- Open Bitcoin Core.
- Select an appropriate data directory.
- Allow the node to begin synchronization.
- Keep Bitcoin Core running.
- Wait until the blockchain is fully synchronized if your intended application requires a fully synchronized chain.
The initial synchronization can take considerable time because Bitcoin Core needs to process the blockchain and verify the data.
Do not assume that Bitcoin Core is ready for mining-related applications simply because the graphical interface opens. Check the synchronization status first.
Step 2: Make Sure Your Node Is Working
Before connecting any pool software, verify that Bitcoin Core itself is operating correctly.
The Bitcoin Core interface provides information about synchronization and network activity. You can also use Bitcoin Core’s RPC interface for diagnostics.
For example, Bitcoin Core supports commands such as:
getblockchaininfo
getnetworkinfo
getpeerinfo
getmempoolinfo
getmininginfo
The exact availability and behavior of individual RPC commands can depend on the Bitcoin Core version you are running, so consult the documentation for your installed release. Bitcoin Core’s current RPC documentation lists both network and mining-related commands.
A healthy node should have active peer connections and should not be stuck far behind the current blockchain tip.
Step 3: Understand Bitcoin Core RPC
RPC stands for Remote Procedure Call.
It allows another application to communicate with Bitcoin Core and request information or perform authorized operations.
For example, a pool server might use Bitcoin Core RPC to request information needed to construct mining work.
One particularly important mining RPC is:
getblocktemplate
Bitcoin Core’s current documentation lists getblocktemplate among its mining RPC methods.
A pool application can use blockchain and mempool information from the node to create suitable work for miners.
This is different from Stratum.
RPC is generally used between pool software and the Bitcoin node.
Stratum is generally used between the pool and miners.
Understanding this difference prevents many configuration mistakes.
Step 4: Locate the Bitcoin Core Configuration File
On Windows, Bitcoin Core uses a configuration file named:
bitcoin.conf
The exact data directory can vary depending on how Bitcoin Core was installed and configured.
If the configuration file does not already exist, you may create it in the appropriate Bitcoin data directory.
Before editing the file, make a backup of any existing configuration.
A basic configuration for a locally hosted application can include RPC settings similar to:
server=1
rpcuser=your_rpc_username
rpcpassword=use_a_strong_random_password
The exact options required depend on the pool software you’re using.
Do not copy random configurations from outdated tutorials without checking them against your Bitcoin Core version.
Bitcoin Core’s documentation is version-specific, and current releases can change configuration behavior.
Step 5: Configure RPC Carefully
RPC is one of the most important parts of this setup.
For a pool application running on the same Windows machine, the safest approach is generally to keep RPC accessible locally rather than exposing it to the public Internet.
Bitcoin Core documentation has specifically warned that exposing RPC over a public network connection is insecure. It also explains that rpcbind should be used when specifying the interfaces on which RPC listens.
A local configuration may look conceptually like:
server=1
rpcbind=127.0.0.1
rpcallowip=127.0.0.1
If your pool software runs on another computer on your private LAN, the configuration becomes more complicated. You would need to determine the private IP address of the Bitcoin Core machine and configure access narrowly.
For example, you might have:
rpcbind=192.168.1.10
rpcallowip=192.168.1.20/32
These are examples only. Replace the addresses with the actual private addresses in your network.
Never blindly expose Bitcoin Core RPC to the Internet.
Step 6: Do Not Confuse Port 8333 With RPC Port 8332
This is one of the most common mistakes beginners make.
Bitcoin Core uses different network services for different purposes.
Port 8333 is commonly associated with Bitcoin’s peer-to-peer mainnet communication.
RPC commonly uses 8332 for mainnet.
For example, Bitcoin Core’s documentation demonstrates RPC calls against:
http://127.0.0.1:8332/
using JSON-RPC.
The important point is:
8333 ≠ 8332
Opening or forwarding the wrong port will not solve an RPC connection problem.
More importantly, you generally should not forward RPC port 8332 from your router to the public Internet simply because a pool application needs RPC access.
Step 7: Connect Your Pool Software to Bitcoin Core
If you are actually operating your own pool, the pool software will need Bitcoin Core’s RPC credentials and connection details.
The configuration will usually ask for information such as:
RPC host
RPC port
RPC username
RPC password
For a pool application running on the same Windows computer, the host would typically be the local machine:
127.0.0.1
and the RPC port is commonly:
8332
Your pool software may use getblocktemplate and other RPC calls to obtain blockchain information and create mining jobs.
Bitcoin Core’s RPC interface currently includes getblocktemplate and submitblock among its mining-related commands.
The pool software then communicates with miners separately.
Step 8: Connect Your ASIC Miner to the Pool
Once the pool software is working, the ASIC miner normally does not connect directly to Bitcoin Core.
Instead, the miner connects to the pool’s Stratum endpoint.
A typical miner configuration contains:
Pool URL: stratum+tcp://your-pool-address:port
Worker: username.worker1
Password: x
The exact URL, port, username format, and password depend on the pool.
If you are using a third-party public pool, use the connection information supplied by that pool.
Do not assume that a Bitcoin Core RPC address can be entered as the miner’s pool URL.
They are different services using different protocols.
Public Pool vs. Your Own Pool
This distinction deserves special attention.
Using a Public Pool
If you are simply joining an established public Bitcoin mining pool:
ASIC → Public Pool
Your personal Bitcoin Core node is optional and generally isn’t part of the mining connection.
You can still run Bitcoin Core for independent verification and network participation, but you normally don’t need to connect your node’s RPC interface to the public pool.
Running Your Own Pool
If you are building a pool:
ASIC → Stratum Server → Pool Software → Bitcoin Core
Here, your Bitcoin Core node becomes an important backend component.
The pool software can use RPC to obtain blockchain information and mining templates.
This is the situation where the phrase “connect public pool to Windows Bitcoin node” can become technically confusing. A public pool is normally someone else’s service. If you’re connecting your own mining infrastructure to your own node, you’re really building or operating a pool infrastructure rather than simply connecting to a public pool.
Step 9: Test the RPC Connection
After configuration, test the connection before troubleshooting the miner.
A simple RPC test can use Bitcoin Core’s command-line tools or another JSON-RPC client.
Bitcoin Core documentation provides examples of JSON-RPC requests sent to the local RPC endpoint.
If your application cannot connect, check:
- Is Bitcoin Core running?
- Is synchronization complete enough for your application?
- Is
server=1configured where required? - Is the RPC username correct?
- Is the RPC password correct?
- Is the RPC port correct?
- Is Windows Firewall blocking the connection?
- Is the pool software using the correct IP address?
- Is another program already using the required port?
- Are you using a configuration option supported by your Bitcoin Core version?
Start with a local connection before attempting a LAN connection.
Step 10: Configure Windows Firewall
Windows Firewall can block legitimate applications from communicating.
If your pool software and Bitcoin Core are running on the same computer, you may not need to expose the service externally at all.
If another machine on your private network needs RPC access, create the narrowest firewall rule possible.
Avoid rules that allow arbitrary Internet addresses to connect to RPC.
For example, if the pool server has a private LAN IP of 192.168.1.20, a firewall rule can be designed around that trusted source instead of allowing every IP address.
Security should come before convenience.
Common Connection Problems
“Connection refused”
This usually means the application cannot reach the RPC service.
Check whether Bitcoin Core is running and whether RPC is listening on the expected address and port.
“401 Unauthorized”
This commonly indicates an authentication problem.
Check your RPC credentials and make sure the pool software is using the correct username and password.
“Could not connect to 127.0.0.1:8332”
If Bitcoin Core and the pool software are on the same Windows computer, confirm that Bitcoin Core is running and configured to accept RPC connections.
The node is synchronized, but mining does not work
A synchronized node does not automatically make your computer a mining pool.
You still need appropriate pool software, a Stratum service, and compatible mining hardware.
Miner connects but receives no work
Check the Stratum server and pool software first.
If the pool cannot obtain valid work from Bitcoin Core, inspect the pool’s logs and verify its RPC connection.
Security Tips for Windows Bitcoin Nodes
Security should be a major priority when running Bitcoin infrastructure.
1. Never share RPC credentials
Your RPC username and password should be treated as sensitive credentials.
Do not post them in screenshots, tutorials, GitHub repositories, public forums, or chat messages.
2. Avoid public RPC exposure
Bitcoin Core’s own documentation warns against exposing RPC over public network connections.
If a service only needs local RPC access, keep it local.
3. Use strong credentials
Do not use passwords such as:
bitcoin123
password
admin
123456
Use a long, unique credential generated specifically for the node.
4. Keep Bitcoin Core updated
Bitcoin Core releases include bug fixes, improvements, and security-related updates. Bitcoin Core 31.0, for example, was released in April 2026, and its release notes explain that older versions can reach end-of-life status.
Check the official Bitcoin Core release information before upgrading and follow the appropriate upgrade procedure.
5. Protect the machine
A Windows Bitcoin node should use normal system security practices:
- Keep Windows updated.
- Use reputable security software.
- Restrict unnecessary inbound connections.
- Use a strong Windows account password.
- Back up important wallet data securely.
- Avoid installing unknown mining software.
Should You Run Bitcoin Core and Mining Software on the Same PC?
You can, but it is not always the best setup.
Bitcoin Core requires disk access, memory, network bandwidth, and CPU resources. Pool software can also consume resources.
If you are experimenting, a single Windows PC may be enough.
For a serious mining operation, separating services can provide better reliability.
A possible architecture is:
Windows PC
   |
   +-- Bitcoin Core
   |
   +-- Pool Backend
   |
   +-- Stratum Server
             |
             +-- ASIC #1
             +-- ASIC #2
             +-- ASIC #3
Larger operations may use dedicated servers or separate machines for different components.
Is a Bitcoin Node Required for Public Pool Mining?
No.
If your only objective is to mine through an established public pool, you typically need:
- Compatible Bitcoin ASIC hardware
- Internet connectivity
- A public mining pool account or worker configuration
- The pool’s Stratum URL
- A Bitcoin payout address
- Proper miner configuration
A personal Bitcoin Core node can still be valuable, but it isn’t normally required for participating in someone else’s public pool.
Running a node is more about independently verifying Bitcoin and participating in the network than about increasing your mining hash rate.
Bitcoin Core describes full nodes as independently validating the blockchain and contributing to Bitcoin’s decentralized architecture.
Final Checklist
Before considering your setup complete, verify the following:
- Bitcoin Core is installed on Windows.
- Bitcoin Core is synchronized.
- Your node has healthy peer connections.
- RPC is enabled if your pool software requires it.
- RPC is restricted to trusted systems.
- RPC credentials are strong and private.
- The correct RPC port is configured.
- Windows Firewall permits only required connections.
- Your pool software can communicate with Bitcoin Core.
- Your Stratum server is running if you’re operating your own pool.
- Your ASIC miners connect to the Stratum endpoint.
- You are not exposing Bitcoin Core RPC unnecessarily to the Internet.
Final Thoughts
Learning how to connect a public pool to a Windows Bitcoin node starts with understanding that a public pool and a Bitcoin Core node perform different jobs.
Bitcoin Core is the blockchain-verification and node layer. A mining pool coordinates miners and creates a system for distributing work and accounting for shares. The miner normally communicates with the pool through a mining protocol such as Stratum, while pool infrastructure can communicate with Bitcoin Core through RPC.
If you’re simply mining with a public pool, you usually don’t need to connect that pool directly to your Windows Bitcoin Core node. If you’re building your own pool infrastructure, however, Bitcoin Core RPC becomes an important part of the backend architecture.
For a reliable setup, start locally, verify Bitcoin Core first, test RPC before adding mining hardware, and keep RPC access tightly restricted. Most connection problems become much easier to diagnose when each component—Bitcoin Core, pool software, Stratum server, and miner—is tested independently.
Most importantly, avoid exposing Bitcoin Core’s RPC interface to the public Internet. A working configuration is useful, but a secure configuration is far more important.
Sources and further reading: Bitcoin Core’s official documentation provides version-specific RPC references, including the current 31.x documentation, while Bitcoin.org provides the official Bitcoin Core download and system requirement information.






One Comment